Showing posts with label recipe. Show all posts

Thursday, 18 July 2013

Fun Mini Pizzas - Kids Cooking

These mini pizzas are great fun to make with the kids and super quick.
The children will love it!


Wednesday, 13 March 2013

Easy Peach & Coconut Cake - Lactose & Milk Free Recipe

Totally Milk Free & Totally Yummy

This is an easy peasy recipe with both 'Busy Mum on the Fly Style' and 'Proper Housewife Style' versions, one being quicker to make than the other but only a few minutes difference. As I run My Funny Bunny I am always very short on time so the busy mum style was totally made up by me!

It is a totally lactose free and milk free cake recipe which I adapted from a Portuguese normal milk recipe and made it my own. One of my kids is lactose intolerant and the other can't have milk at all, so this is an awesome treat for them and it tastes awesome!!

Ingredients:

6 Eggs
2 Small soya yoghurts (we used peach flavour)
3 Yoghurt cups of flour
3 Yoghurt cups of sugar
2 teaspoons of baking powder
½ Yoghurt cup of extra virgin coconut cream - melt for about 15 secs in the microwave (we used Royal Green organic one).

Use the yoghurt cup as a measure for the ingredients.

Busy Mum on the Fly Style -

Chuck all the ingredients in a bowl, beat them very very well and put in a tin that has been buttered and floured and pop it in the oven at 180 degrees in a fan assisted oven.

VoilĂ !

Your cake is ready when it looks lovely and brown and when you stick a spaghetti in it and it comes out nice and clean, if it comes out with sticky cake on it then leave it in the oven for a little while longer.

That is the way we made it.... and it came out lovely!

If you have the time then do it Proper Housewife Style -

Beat the egg yellows and the sugar very well and then in a separate bowl beat the egg whites until they form stiff peaks.

Now join all the other ingredients to the egg yellow mixture and again beat very well, after you have done this add the fluffy egg whites to the mixture and fold in gently (preferably with a metal spoon) until it is all mixed in.

It's done so now pop it in a buttered and floured tin and follow the instructions above.
You will end up with a much taller and fluffier cake than if you make it 'Busy mum on the fly style'!

Enjoy,
M x

PS. If you don't have coconut cream use vegetable oil & you can use other flavours of soya yoghurt but changing those will of course change the taste of this lovely cake.

Friday, 25 February 2011

Vla - a Dutch Recipe

When I was little my mum lived in Holland for a few years, so I went to stay with her on school holidays as I was living in Portugal with my grandma.

My fondest memories of Holland are a round bread that I used to get from the shop underneath my mums flat, playing with a girl outside my mums flat (she spoke no portuguese and I spoke no dutch but we were best friends), my mum making my hair curly, dressing me in a pretty dress and going taking me on a walk which we went past a river and Vla....

Vla, in chocolate, strawberry or vanilla.... seriously I could probably drown in the stuff I liked it so much! Its not custard by any means but its similar, only 100 times better...

A couple of days ago I popped over to Tales from Windmill Fields blog and saw the nice cartons of Vla as her Dutch thing of the week, I think it should be the Dutch thing of forever really, never mind the week but it did make me crave Vla. I went to search for Vla to see if there was anywhere I could buy it in the UK but had not much luck apart from coming across a recipe that looks simple enough to make here on Thomers' website, now I hope he doesn't mind but I had to share it with you and pop it on here for my future reference as I don't want to ever loose sight of it.

I'll certainly have to try and make it and tell you all how it worked out, if you make it before me, let me know how it went. Apparently in America they call this cornstarch pudding, not sure if theirs is the same but hey we won't know until an American tells us so!

Chocolate vla topped with whipped cream

VLA RECIPE:


Ingredients:
  • 1 litre of whole milk
  • 1/4 litre (1 cup) of heavy cream (or less, down to 50ml or 1/4 cup)
  • 70 grams (1/3 cup) of sugar
  • 2 additional tablespoons of sugar
  • 2 eggs
  • 40 grams (slightly less than 1/3 cup) of cornstarch
  • a half or whole vanilla bean (or plain old vanilla flavoring)
  • optional: yellow food coloring
Add a few tablespoons of milk to the cornstarch and stir until the cornstarch dissolves and the liquid is uniform. Heat up the remaining milk in a large pan with a cut open vanilla bean in it. 

In the meantime, use a (hand)mixer to beat the 70g of sugar with the eggs until foamy—this takes a few minutes. Keep an eye on the milk. When the milk starts to boil, lower the heat and dump in the cornstarch fluid and stir until somewhat gelatinous—this should take a minute or two, but don't worry if it doesn't get gelatinous. Keep it on a very, very gentle boil.

Slowly pour in the foamy egg/sugar mix into the gently boiling milk; keep it like that while gently stirring and beating the mix until the vla is uniform and somewhat gelatinous.

To cool it, pour the vla into a bowl and lower the bowl into a larger bowl filled with cold water. Stir the vla every few minutes and replace the lukewarm water with cold water. Store in fridge.
Before serving, beat the desired amount of heavy cream with 2 tablespoons of sugar until stiff and stir into the vla—use less cream to keep the vla lighter. If you want to make it look more like the real thing, add 10-15 drops of yellow food coloring and stir.

Optionally sprinkle some hagelslag (chocolate sprinkles) on it for the full effect.
Enjoy the taste of Holland.

Monica xx

Thursday, 20 January 2011

Vovo Nene's Moist Carrot Roly Poly - Torta de Cenoura da Vovo Nene - Recipe

This recipe is very special to me, I lived in Portugal with my grandma until I was ten years old, she gave me the best birthday parties ever, with beautiful themed birthday cakes handmade by the same lady every year and a "menu" of cakes and sweeties that I loved, year after year.

This year for my husbands birthday I decided I wanted to treat him to one of my childhood favorites, so I asked my grandma teach me how to make it, and it turns out it's really easy!

I am sharing my grandma's recipe with you because I think it's the yummiest ever and a great way to get the kids to eat carrots :)

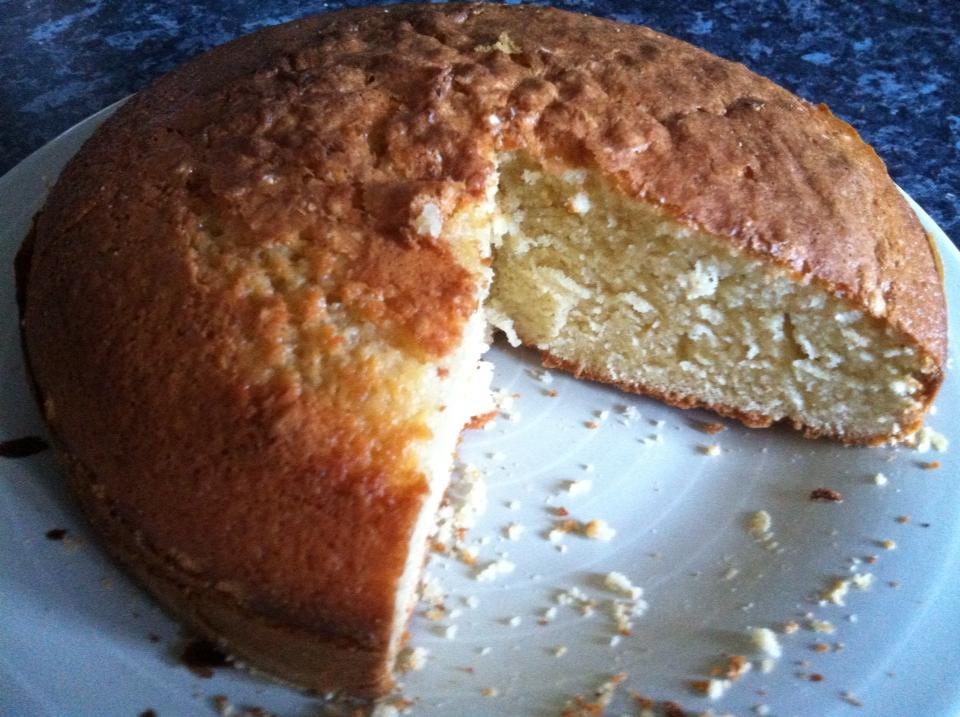
Vovo Nene's Torta de Cenoura
Ingredients:
Carrots - 1.150 kg
4 eggs
Sugar - 500g
Baking Powder - half a teaspoon
Flour - 4 Spoons
Butter/ Margarine to grease

Equipment:
Oven tray
Greaseproof paper
Vegetable mill or food processor
Sift (or colander with really fine holes), if you have none of these improvise with an old kitchen towel.
Mixing Bowl x 2
Whisk / Hand Mixer

Peel & cut the carrots in smaller pieces and boil them. Once boiled, drain them very well, then use a vegetable mill or food processor to cut them all up so it resembles a carrot "mash". You then put the carrot "mash" into a sift (a sort of colander with really fine holes) and leave it resting over a container for the water to drain.

If you have not got a sift or a colander with fine holes, drain as much water as possible out while in the pan and then put carrot "mash" in an old and clean kitchen towel, bring the cloths points together and twist so you get as much of the water out as possible.

The longer you leave the carrots to drain, the better, my grandma says you should leave it overnight but I as I am not very patient I leave it for a few hours and from time to time I mix it around and push it down with a spoon to get as much water out as possible.


Once the carrots are well drained they should be roughly half the weight, so assuming you started with 1.15kg you should end up with around 500g of carrot "mash".

Take the carrot mash an place it in a large mixing bowl, add the sugar and mix it up.

Now take the eggs and separate the egg yellow from the white, placing the white into a separate mixing bowl and the yellow into the carrot mixture and mix it around, do this for all 4 eggs and make sure you give the carrot mixture a mix each time you put a egg yellow in.

Once that is done you should have a bowl with the egg whites, whisk until you get firm/ stiff peaks, you should be able to tilt or tip your bowl and the egg whites stay where they are, leave this to one side. (video on how to beat egg whites here)

Now add the flour and baking powder to your carrot mixture and mix well, take your bowl with the beaten egg whites and place about have of those to the carrot mixture and fold the mixture to involve the egg whites in, this is done slowly and in a folding motion as to keep the egg white air bubbles intact so you get a fluffy and airy mixture, add the remaining egg whites and repeat.

Now you should have a lighter carrot mixture, lighter in texture and lighter in color, its tempting but try and not taste it because if you are anything like me you will end up with a much smaller cake!!

Take an oven tray, it has to be a bit deep, (the one I use is 33cm wide, 26cm height and about 6cm deep) , cut a greaseproof sheet and cut it to size, remembering that you need it to cover the sides, grease it with butter or margarine. Place the greased sheet in the oven tray and then place the carrot mixture in it, spread it nicely so it goes to all the corners.

Now it goes in the oven at 180 degrees (mine is a fan assisted electric oven, may vary in other ovens) for around 40 minutes until ready. You can check if it's ready by taking a piece of spaghetti or a skewer and "stabbing" the cake in the middle, if the skewer or spaghetti comes back clean, it's ready, if it comes back with mixture, then it needs to stay in for longer.

When you take it out, let it cool down a bit, while still warm (as warm as your hands can handle, without burning yourself of course!) and roll up on the widest side, this is best done on a flat surface, using the greaseproof paper that it was baked on.

Let it rest, so it cools and settles and pop it on a serving tray or plate.

The picture on top is of about half the cake as we had already managed to eat the other half by the time I took it.

You can make it with less sugar for a healthier option, try about 400g of sugar, it ends up not so "sticky" and sweet but still tastes mighty nice! Any questions, or just to let me know how you liked it, please comment below :)

Enjoy!

Monica xx

Wednesday, 15 December 2010

Attempting to plan ahead...

Yes, anyone that knows me knows that I am not too much into planning ahead... planning ahead to me involves writing something on my calendar and leaving it at that.

Not because I can't do it, it's more to do with "I never know what will happen tomorrow" syndrome... so I only plan ahead in detail when I absolutely have to.

Eating on a budget and with not much time to cook, lately we have been falling into the evil ready meals route far too many times than I have liked and this has resulted in particularly me and Booboo not having as many healthy stomach "turns" as is appropriate.
After having 2 kids that is not great for me as my digestive system is sluggish so I put on unhealthy weight and have trouble going to the loo, and then comes the "I am too tired to do anything" attitude too!!! So I need to get back in control and do the right thing.

Another thing is we have been eating far too much meat and not enough vegetables, we all know about animal cruelty and how cows massively contribute to global warming, but realistically I know that we can't be vegetarian, so I just want to cut down on our meat intake and really increase our vegetables, pulses, and other good stuff.

In my attempt to "fix" all of the above and I came up with a "Menu" for the week ahead, a menu that I hope we will achieve eating healthily on a budget.

For lunch we will eat left overs from dinner, I will make more to accommodate as I don't have the time to be cooking lunch and dinner.

Dinner Menu for a Week

Wednesday (today): Chilli con Carne with carrots & Rice
Thursday: Meat Free Sausages with caramelised onions & Fine Green Beans
Friday: Portuguese Pea Dish with Chorizo and Egg ( Ervilhas com Ovos Escalfados ) 
Saturday: Garlicky Potato, Carrot & Ham Bake
Sunday: Tomato & Red Lentil Soup with bread on the side
Monday: Salmon & Onion Fishcakes with Tomato Salad
Tuesday: Portuguese Dish - Gay Chicken (Frango a Paneleiro)
Wednesday: Tuna Nicoise Salad

So I will try to stick to the plan and tell you what happened next week!!
Hopefully a fresh pre planned menu will also restore my enthusiasm for cooking because I have been so bored and fed up with cooking!

What do you do to keep your "menu" fresh & on budget?

Monica xx

Tuesday, 26 October 2010

Madeira Cake - Bolo Ingles Recipe


Being Portuguese can be a bit of a stress if you live out of Portugal, our cuisine and Patisserie is so rich that if you don't have where to satisfy your cravings, you become home sick. Having 4 "Children", can make it even more stressful as you want to bring them up with all their portuguese roots in place. Being the Matriarch?!!! Ouch...what a pain/ pleasure relationship!!
So, when we get to birthdays, we have the ones who prefer the wonderful, delicious birthday cakes, (that includes sis, brother in law, son in law, nephew etc. etc. etc. LOL), from Lisboa Patisserie (Portobello, Golborne Road, London W9) and the ones who prefer Mum's funky birthday cakes.

I baked this one for my eldest boy's birthday 2 weeks ago, just to hear from "the horse's mouth", "This was your best ever, Mum!!!!"  (pain/pleasure relationship).  Since then he baked it for me last week, and hopefuly I will be baking it for my sister this Sunday.
Here you have it, you can impress too.......

Madeira Cake - Home Baked Birthday Cake
(Portuguese recipe - Bolo Ingles from Farinha Branca de Neve)
Serves 10-regular portions (regular eaters)
Serves 5 -large portions (Big eaters)
Double it if you want to serve  20 regular/10 big eaters

Ingredients:
  • 250g of Sugar
  • 250g of Self Raising flour, (the better the quality, the better the cake)
  • 250g of Butter/ Margarine (it tastes way better using better)
  • 1 heaped teaspoon of Baking Powder
  • 4 Eggs
  • 1 teaspoon of Vanilla extract
  • Lemon zest/orange zest/almond extract or any other preferred flavour - to taste
  • Margarine to grease tin
  • Flour to dust greased tin
  • Baking Tin, this can be any format or material, silicone is lovely, but please still grease it and dust it, as I can't vouch for the results without doing that.
Preparation:
  • Warm up the oven on full blast, now rub some margarine all over the interior of the tin or mould, paying particular attention to curves and corners, all has to be generously covered, then pour some flour into it and shake it , shake it until the inside is all covered by the flour, pour any excess out by shaking or tapping the tin upside down (if using silicone, please still do this).
  • Separate the egg yolks from the whites, keep the whites in a clean bowl big enough to beat them in to a firm foam. Do not beat them yet.
  • Mix the sugar with the egg yolks, beat it until it turns to a smooth whitish cream.
  • Add the vanilla, the citrus zest, or a flavour of your choice to the creamy mixture, beat it a bit more.
Beating in the initial stage
  • Melt the butter or margarine to a soft liquidly point.  Beat it into the mixture, now you should give it a good beat all around, the more you beat it the better it will come out.
  • Add the baking powder to the flour
  • Add the flour progressively to the mixture while you are beating it. Don't give up beating, only stop when the machine needs a rest or the mixture makes loads of bubbles.
    Beating while adding the flour progressively
  • Now wash the whiskers very well and dry them.  Go back to the egg whites that were left in a clean big bowl.  Beat them to a firm foam. You will know they are ready when you can turn the bowl upside down and they don't fall.  Try by tilting the bowl a little at first (they shouldn't move), otherwise you may end up with it all on the floor! lol
Beating egg whites until they are firm
  • With a wooden spoon this time, mix them into the cake mixture, folding them in rather than beating, or stirring, once well folded its ready. (Folding the egg whites in keeps the "bubbles" intact and this is what makes the cake soft and airy)
  • Pour the cake mixture all into the tin,  you must have about 2 fingers height of room left on the tin to allow dough to raise, it will raise out of the tin anyway, but if not deep enough it will raise uncooked and flow down on to the oven.
    Cake mixture before going into the oven
  • BRING THE OVEN TEMPERATURE TO THE MIDDLE POSITION, place the baking tin in the middle shelf of the oven. 
  • Check in half an hour, 45 minutes if you doubled the recipe. (to check you can stick a wooden skewer or pick in the centre of it about 2" deep, to be ready the pick needs to come back moist, but not full of liquid/soft dough. If the pick brings dough, it needs a further 5 or 10 minutes checking regularly, if its completely clean and dry you have just past the perfect point, if moist, then its perfect.
  • DO NOT LEAVE IT IN THE OVEN EVEN IF OVEN IS OFF.  Take it out of the oven, let it cool down until safe to handle with pegs. (due to all the turning involved).  Gently shake tin to loose it up. Turn tin upside down onto a plate and cake should pop out of the tin. Turn the cake the right way up.
Serving Suggestions:

  • Served warm, plain or with custard
  • Can be sliced in half and filled with jam of your choosing
  • Covered with any topping of your choice, eg. butter icing, meringue, etc. (To cover it let the cake cool first otherwise topping will melt off, but to fill it do it while hot to absorb a bit into the cake.)
  • Simply sprinkle it with Icing sugar.
    Whatever way you choose to eat it, it will be delicious! ;)

    BOM APETITE!!!

    Mum aka Funnybanana
    P.S. Next week we go back to chicken.....this time a very special, very personal recipe by Funnybanana Dad!

    Saturday, 9 October 2010

    Secret Within... Recipe


    A very long time ago, we have had a coffee shop in Faro, Algarve Portugal, there we served light meals, in particular at lunch times. The Portuguese have two hot meals a day, lunch and dinner.  So, everyday we had to come up with a special.


    One day, I came up with this, my own recipe from scratch....
    Secret Within - Individual Portion
     The secret within...(Minced Meat Dish)
    Portuguese recipe - Segredo de Carne

    *Serves 4 - regular portions
    Serves 2 - large portions
    (Meat can be replaced by vegetarian substitute but please note I can't say it will taste the same.)
    *Half it if you want to serve just 2 regular eaters

    Ingredients:
    • 600-800gm of Minced Beef, (Pork, mixed or lamb)
    • Salt, (table or sea salt)-to taste 
    • Ground Black Pepper or Piri-Piri-To taste 
    • Margarine-1 Table spoon-leveled 
    • Olive Oil-4 Table spoons-leveled-(for the meat)
    • Olive Oil + 1 table spoon of Margarine-leveled (to Fry the eggs on)
    • Oil-as needed, (for the option of frying the chips) 
    • Lard-2 Table spoon-leveled 
    • 1 Bay Leaf 
    • 1 Garlic Head/Paste
    • Parsley-a few stems 
    • 1.5kg bag of precooked oven chips-(can be replaced with real chips from peeling and slicing potatoes in to sticks)
    • 4 eggs
    • Grated Cheese -to taste
    • Deep Fryer, (or deep frying pan for the chips, alternatively prepared in the oven according to instructions in the packet, Bla, Bla, Bla.)
    • Shallow frying Pan, (big enough for the amount of meat in question)
    • Small Shallow frying pan to fry the eggs
    • Oven & Tray or alternatively Microwave and individual plates
    Preparation:

    Wash the  bay leaf, parsley, and peeled garlic, open the meat packet and leave as is.
    Chop the Parsley finely and chop the garlic in tiny sticks and tear the Bay leaf.

    Turn the oven on full blast.

    In the larger shallow frying pan, (for the meat), place the bay leaf, the olive oil, lard, margarine, garlic, and heat it up.
    Start adding the meat by pulling a part the little strings of mince, (no mince can be left stuck together), sprinkle it all with pepper and salt, turn it around until cooked to taste, sprinkle the chopped parsley, mix, mix, mix.  Ready!!

    In the small shallow frying pan, (for the eggs), place the olive oil and margarine, and fry the eggs. (medium heat, pouring the fat on the top of the eggs constantly until cooked to preference)

    Put the deep fryer on, and once hot enough start frying the chips (if you don't have a deep fryer, do your oven chips in the oven as normal), after cooked put them in an oven tray, or divided on to serving plates, (if using Microwave).

    On the top of the chips put the prepared meat, spreading it evenly. Cover with Grated cheese.
    Place it in the oven top shelve in full blast, you only want to melt the cheese.
    Once ready, divide into portions (if applicable) and serve with fried egg on top

    BOM APETITE!!!
    Mum-AKA Funnybanana

    Tuesday, 28 September 2010

    Gay Chicken (Frango a Paneleiro) Recipe

    Portuguese recipe - Frango á Paneleiro
    Frango a paneleiro / Gay Chicken after cooked & cut in half

    Serves 4 regular portions (1/4 chicken each portion)
    Serves 2 large portions (Big eaters - 1/2 chicken each portion)
    (please note this can only be done with whole chickens, it will not work with half chickens)

    Ingredients:

    1 Small Chicken
    1 Lemon
    Salt, (table or sea salt) to taste
    Ground Black Pepper or Piri-Piri to taste
    Margarine - 1 level table spoon
    Olive Oil - 2 level table spoons
    Lard - 1 level table spoon
    1 Bay leaf
    1 Garlic head or 1 level table spoon of garlic paste (paste works better)
    1 Onion - medium sized
    Coriander - a few stems
    Parsley - a few stems
    Paprika - 2 tea spoons
    Beer/White wine - 1 Mug
    No sparkly wines or sweet wines to be used, the same goes for non alcoholic, as it will leave a sweet unpleasant taste to it. (please note the alcohol will evaporate as it cooks so it should not interfere with any religious beliefs, however if need be it can be replaced with water,  but it will not be as tasty!!)
    Equipment needed:
    Oven tray - Should be as small as possible according to amount of chicken.
    Kitchen Foil

    Preparation:
    Pre-heat oven on full blast

    Wash and prepare the chicken by getting rid of excess fat, feathers etc. Wash the inside of the chicken well.

    Wash the lemon, bay leave, herbs, peeled onion and garlic (if whole, not paste! lol).

    Leave the herbs whole
    Chop the onion in medium chunks
    Chop the garlic in tiny sticks
    Break the bay leaf
    Stab the lemon all around with a fork.

    In the tray rub the salt, Pepper/Piri-Piri, Bay leave, Paprika, Herbs, and garlic on the chicken. Massage, massage, massage, first outside then inside the chicken, the longer you massage it on the chicken, the tastier it will be (hence the name).

    Place the chicken breast facing upwards in the middle of the tray, stick the stabbed lemon in its rear end, (stuffed inside chicken), spread the onion around it, pour the beer or white wine over it. Cover with kitchen foil.

    Cook in the oven, (middle shelf), covered with the foil in full Blast for 30 minutes, (double for 2 chickens or large chicken), Check, pour sauce over it, turn it breasts down, cover it again, (fan assisted ovens take away 10 minutes per stage or more depending how strong is your oven), put it back in the oven, now we only need it at 3/4 not full blast. Wait another 30 minutes.

    Halfway through cooking - Doubled recipe
    Uncover it, turn it breast up again, it should be cooked by now, check for blood near bone, if no bloody fluids, then it's cooked. Put it back in the oven (uncovered) on full blast again, for 15 minutes, just to get tanned to taste, you may find that you like it lighter therefore 15 minutes will be too much.

    Remove lemon before serving. Do not leave it on the tray or break off while taking it out, as it will turn everything very bitter.

    Serve with white rice with butter and chips, and/or salad.

    BOM APETITE!!!

    Wednesday, 18 August 2010

    Portuguese Rice Pudding "Arroz Doce" Recipe

    My mums rice pudding is the best ever! 


    I hope you try it next time you're in the kitchen, you won't regret it!
    She shares it with you below.
    The pic shows one without cinnamon, and don't forget you can try and replace the milk with soy milk, etc for a vegan rice pudding!


    Its yum!
    Monica xx

    Ingredients:
    4 pints of milk
    1 heaped (Soup) spoon of Custard Powder
    Sugar to taste
    2 Cinnamon Sticks
    2 Lemon peel, (outside peel, cut like potato peel)a slight pinch of Salt only.(note: if over salt it, it will hold a bad taste, so its just a pinch)
    1 Hand full of Rice. (put your hand inside the bag and grab hold of the most rice you can by closing you hand, let the excess fall as you hold tight)

    Start by putting 2 pints of milk, salt pinch, cinnamon sticks and lemon peel, in a pan, bring it to boiling point, (milk rises very quickly, be careful not to let it spill, as burnt milk has a foul smell and you will be short in fluids at the end).

    Add the rice, and stir often, always taking care not to let it raise above the edges of the pan. You will have a load of fluid and some rice scattered, that is how it should be. Its ready for the next step when rice is over cooked, (very puffy and soft).

    At this stage add another pint of milk, (only when rice is cooked enough, if you were to add the sugar or cold milk before the rice is cooked enough, the rice would stop cooking and remain hard/rubbery). Add the sugar to taste, our family loves it sweet, so we make it very sweet, about 250gm of sugar. However each person may have different sugar tastes, so add sugar to taste, (after adding the desired sugar you can always try a bit of the sauce/milk to see if it is enough or you require more).

    Let it boil for about 5 minutes in slow temperature, (enough to keep it boiling).

    Meanwhile get a tall bowl, pour in the remaining pint of milk, and add the heaped spoon of custard, (you may add an extra leveled spoon of custard powder if you want it really creamy), mix well, as often it sticks to the bottom of the bowl, so make sure it has completely disolved.

    Once the 5 minutes or so have passed pour in the custard mix. Bring it to the boil again, it should now be a lovely yellow creamy substance, ready... steady... Eat....., (when hot it may upset your bowels, so let it cool off, remember to lick the pan, (using a spoon of course).

    You need to pour it immediately into containers, individual or not. Container/s need to be taller rather than wider, to keep it creamy and avoiding to dry off. You can then powder the top of the rice pudding with grounded cinnamon.

    From your first time confectioning it, you can then adjust the amounts of custard, milk, and sugar to your own liking. If you have guests and want to impress just double or triple the ingredients and make enough for everyone. I always do 12 pints of milk, as they are many, and love it.

    You can also work with half water half milk, but will not be as creamy.

    Little Secret: if you ever manage to get to a Portuguese supermarket or you travel to Portugal, replace the  custard with: "Leite Creme"-Brand "Royal" , you will then be hooked for life.

    BOM APETITE - Enjoy your Dessert 


    Mum aka FunnyBanana

    Thursday, 18 February 2010

    It's Thomas' 65th Birthday Party & you're invited!

    Make tracks to a fabulous destination on Sunday 7th March 2010 as everyone’s favourite little blue engine, Thomas the Tanks Engine, celebrates his 65th Anniversary in style at everyone’s favourite toy store, Hamleys!


    The double celebration, as Hamleys celebrates its 250th anniversary this year, will see an afternoon of FREE family fun and Thomas & Friends based activities taking place at the famous Regent Street store. 


    Date: Sunday 7th March

    Time: 12pm onwards

    Location: Hamleys, 188-196 Regent Street, London

    Entry: FREE

    Children and grown-ups alike will be able to participate in fun storytelling sessions, exciting competitions and Thomas & Friends screenings. There will also be a fantastic Thomas window display, the opportunity to meet the Fat Controller and make your very own Fat Controller hat to take home at special workshops.

    On the 7th March, Thomas & Friends will also be setting out to create the world’s longest Thomas train cake at Hamleys. With help from National Autistic Society’s patron and renowned cake maker, Jane Asher, everyone coming along to the party is asked to help by baking their very own carriage cake to be added to a very special Thomas cake created by Ms Asher.


    Find out how to make your own carriage cake to bring along, visit http://www.thomasandfriends.com/thomas.mvc/anniversary for the perfect recipe and video guide from Jane Asher herself.

    Throughout March, the following fun and free Thomas & Friends activities will continue at Hamleys:
    * Storytelling sessions at 1pm, 3pm and 5pm everyday 
    * Meet the Fat Controller: Saturday 6th, 13th, 20th and 27th March at 11am or 3pm 
       Sunday 7th, 14th, 21st and 28th  March at 12pm or 4pm
    * Fat Controller hat making workshops everyday at 12pm, 2pm and 4pm 
    * Daily competitions to win great Thomas prizes 

    Have Fun! Monica xx

    Monday, 25 January 2010

    Koeksisters Recipe

    I have just found this recipe on the internet and can't wait to try making it as a surprise for my hubby!

    It's a traditional South African sweet & I'm sure my hubby will appreciate a taste of home!

    I tried this on my first visit to S.A and I must say I got hooked on them! The only thing is you can't eat too many otherwise you wont fit in your jeans!!!


    Koeksisters - Very sticky & very sweet South African cake

    Approximately 30 mins preparation & 5 mins cooking time


    Ingredients

    For the syrup:
    1kg sugar
    500ml (2 cups) water
    2 pieces fresh green ginger (each 5cm), peeled and crushed
    2ml (½ teaspoon) cream of tartar
    Pinch of salt
    Grated rind and juice of ½ lemonFor best results, prepare the syrup the day before and chill over-night

    For the dough:
    500g flour
    2ml (½ teaspoon) salt
    30ml (2 tablespoons) baking powder
    55g butter, cut up
    1 beaten egg
    250-375ml (1-1½ cups) milk or water

    Instructions

    Syrup:
    1. Add all syrup ingredients into a saucepan and heat until all the sugar has dissolved (stirring continuously).
    2. Cover and boil for 1 minute.
    3. Uncover the syrup and boil for a further 5 minutes (do not stir).
    4. Allow the syrup to cool for a minimum of 2 hours in the fridge (best results chill over night).

    Dough:
    1. Sieve the flour, salt and baking power.2. Rub in the butter with your fingertips.3. In a separate bowl mix the beaten egg and 250ml (1 cup) of the milk or water.4. Add the dry ingredients to the egg/milk mixture and mix lightly.5. Add more milk/water if the dough is too stiff.6. Knead well until small bubbles form under the surface of the dough.7. Cover with a damp cloth and allow to stand for 30 minutes –1 hour.

    Final steps:

    1. Roll out the dough to a thickness of 1 cm.
    2. Cut strips, 1cm wide
    3. Plait either 2 or 3 strips together and cut them at a length of 8cm
    4. Pinch the ends together.
    5. Heat 7-8cm deep oil to 180-190°C and fry the koeksisters for 1-2 minutes (until golden-brown) on each side.
    6. Remove them from the heat and drain on some paper town.
    7. Soak them in the chilled syrup for 1-2 minutes.
    8. Remove the koeksisters from the syrup and drain on a wire rack.

    Hint: To keep the syrup cold, stand it in a bowl of ice whilst soaking the hot koeksisters in it.


    Tell me if you try making it yourself! They are yummylicious!

    Monica x

    Recipe courtesy of www.Zauk.co.uk
    Pic courtesy of www.clubexplorer.net

    Tuesday, 24 February 2009

    Pancake Day & Nita's Bday!!!

    Its pancake day, coincedently it's also my niece's 3rd bday...she lives in South Africa so we miss her terribly and wish we were there to celebrate it with her!!!
    Over the week end she had a ladybird themed bday party! She looks so cute! Look at that ladybird cake, how adorable is that?! ;)
    We miss her lots and am gonna make pancakes today thinking of her too!
    Here is my simple pancake recipe...

    100g white plain flour
    1 egg
    150ml milk
    150ml water
    1 teaspoon olive oil (plus more for greasing the pan)

    Sift the flour into a bowl, make a well in the centre and break in the egg.
    Add a little milk and stir gently. Add the rest of the milk slowly and stir until smooth. Stir in the water and oil and beat for one minute.
    (If you have an electric whisk bung all the ingredients in a bowl and whisk until you have a smooth batter)
    Heat a drop of oil in a large frying pan. When the pan is really hot, pour in just enough batter to cover the pan with a thin coating. Cook for just under a minute - using a spatula to keep an eye on how it's cooking.
    Now the fun bit ... FLIP IT - or if you find you're dropping too many, turn it over with the spatula! Cook the other side for 15 seconds.
    Have fun!!!! Monica xx

    Monday, 9 February 2009

    Valentine Sugar Cookies

    GET INTO THE VALENTINE SPIRIT!

    Wanted to share this recipe I found cause they look so yummy!
    I am gonna give it a go! Let me know how you get on if you try them out.

    Active Time: 30 Minutes
    Total Time: 2 Hours 40 Minutes
    Yield: Makes about 2 1/2 dozen cookies

    For an afternoon kitchen project, you'll want to make the dough ahead of time, so it will be chilled enough for you and your little ones to roll out.

    RECIPE INGREDIENTS
    1 1/2 cups all-purpose flour
    3/4 teaspoon baking soda
    1/4 teaspoon salt
    1/2 cup (1 stick) butter, room temperature
    1/2 cup superfine sugar, plus more for sprinkling (or granulated sugar processed for 10 seconds in the food processor)
    1 large egg, beaten
    1 1/2 teaspoons vanilla extract
    3 drops red food coloring

    DIRECTIONS
    In a bowl, whisk together the flour, baking soda, and salt.
    In another bowl, use an electric mixer set on medium speed to beat together the butter and 1/2 cup sugar until light and creamy, about 5 minutes. Beat in the egg and vanilla, and continue to mix for 2 minutes.
    On low speed, gradually add the flour mixture to the butter mixture until just combined. With lightly floured hands, gather the sticky dough into a ball. Divide the ball in half. Return one half to the bowl, add the food coloring, and mix until blended. With floured hands, form each half into a ball. Divide each ball in half, and flatten each half into a disk. Wrap each disk in plastic wrap. Refrigerate until firm, at least 2 hours or preferably overnight.

    Preheat oven to 375 degrees F. Set aside the 2 1/2-inch and 1- or 1 1/2-inch heart-shaped cookie cutters, and two ungreased or parchment-lined baking sheets.
    Remove one of the plain dough disks from the refrigerator. On a lightly floured board, on a pastry cloth, or between two sheets of heavy-duty plastic wrap, roll out the dough 1/4-inch thick. (If it is too hard, let it rest for 5 to 10 minutes.) Use the 2 1/2-inch cookie cutter to cut the dough into hearts. Use a spatula to place the dough on a baking sheet, leaving 1/2 inch between the hearts. Repeat rolling and cutting with one of the pink dough disks.

    To create contrasting colors and patterns on each cookie, use the 1- or 1 1/2-inch cutter to cut out and lift out a smaller heart inside, or to the outside edge of, the larger heart. (The small heart will lift up with a cutter.) Pop out the dough with your fingertip, and replace it with a heart of the contrasting color. (Dough scraps can be combined by color and rerolled once, or both colors can be combined once to make marbleized hearts.) Sprinkle with sugar.
    For soft cookie, bake until set but still pale, about 8 minutes. For crisper cookies, bake until pale golden, 10 to 12 minutes. Transfer to a wire rack to cool completely. Repeat rolling, cutting, and baking with the remaining chilled dough.

    VARIATIONS:
    For flavored hearts, substitute 1 teaspoon of the vanilla extract with wintergreen, lemon, or almond extract. Continue as directed.
    For spicy hearts, add 1/2 teaspoon cinnamon, nutmeg, ginger, or Chinese five-spice to the other dry ingredients, and continue as directed.

    TIPS FOR ROLLED COOKIES:
    Using a superfine sugar creates a lighter, flakier cookie.
    Forming dough into disks instead of balls before chilling guarantees easier rolling.
    Rolling chilled dough between two sheets of lightly floured heavy-duty plastic wrap is an easy way for beginners to get good results (I use Saran Wrap). By lifting the bottom sheet, the cut shape will often pop right out, ready to transfer to the baking sheet.